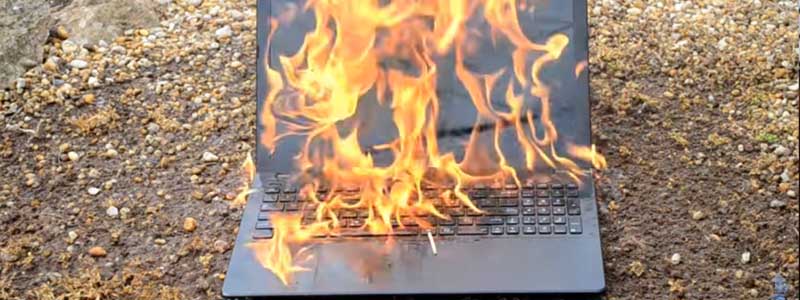
A laptop that runs hot is not automatically a laptop in trouble. Modern mobile chips are designed to sit near their thermal ceiling under load and pull their clocks back when they reach it, so heat plus a loud fan is normal behavior, not a fault. The problem is the machine that hits that ceiling within seconds of doing anything, stays there, and crawls.
This guide separates the two. It covers how to read temperatures against the figure your specific chip is actually rated for, the software-side changes that cost nothing, and the physical work — dust, thermal paste, thermal pads — that fixes the majority of genuine cooling failures on an older machine.
What’s Inside
- 1 – How to Tell If Your Laptop Is Actually Overheating
- 2 – What Causes a Laptop to Overheat
- 3 – Fixes That Do Not Require Opening the Laptop
- 4 – Cleaning the Fan and Heatsink Safely
- 5 – Replacing Thermal Paste and Thermal Pads
- 6 – Cooling Pads and Other External Measures
- 7 – When Overheating Points to a Hardware Fault
- 8 – Final Thoughts on Fixing an Overheating Laptop
How to Tell If Your Laptop Is Actually Overheating
Just because a laptop feels hot doesn’t mean it’s overheating. The symptoms that matter are the ones that come with the heat: sluggish performance under load, a fan that runs at full speed and never settles, freezing, or an abrupt shutdown.
When a CPU reaches its thermal limit it reduces clock speed to protect itself. Intel describes throttling plainly as a mechanism to reduce the clock speed when the temperature rises above TJ Max, both to protect the processor and to indicate to the user that there is an overheating issue to monitor. Hitting that limit is a designed-in safety response. Living at that limit is the signal that cooling has degraded.
Do not use a generic “safe temperature” number. Intel states that the maximum operating temperature limit varies per processor and is usually between 100°C and 110°C, and directs you to the Tjunction figure on that chip’s own specification page. The Core Ultra 7 255HX, for example, lists a 105°C maximum operating temperature. Look up your part number before deciding a reading is bad.
Tools for Reading CPU Temperature and Load
Start with Task Manager to see what is consuming the CPU, then go deeper if the culprit isn’t obvious. Microsoft’s Process Explorer shows per-process CPU detail that Task Manager summarizes away, which is useful when a background service is the thing keeping the package hot.
For live temperatures, Core Temp reads per-core sensors and reports the chip’s own Tjunction value, which saves you a trip to the spec sheet. HWiNFO is the more thorough option, exposing package temperature, per-core clocks and the throttling status flags together — that combination is what tells you whether a hot reading is actually costing you performance.
Watch the clock speed alongside the temperature. A chip sitting at 95°C while holding its boost clock is working as intended; the same chip dropping to base clock or below is throttling hard, and that is the condition worth fixing.
What Causes a Laptop to Overheat
Most cases come down to the cooling path failing somewhere along its length: blocked intake vents, a fan clogged with a felted dust mat, an exhaust choked at the fin stack, dried-out thermal paste between the die and the heatsink, or degraded thermal pads on the surrounding power-delivery components.
Software causes exist too and are cheaper to rule out first. A runaway process, a stuck Windows Update, an aggressive background indexer or malware will keep the CPU pinned, and no amount of cleaning fixes that.
Use matters as well. Vents on the underside are easily blocked by soft surfaces — running a laptop on bedding or carpet for long stretches restricts intake airflow and pushes temperatures up on hardware that is otherwise fine.

Fixes That Do Not Require Opening the Laptop
Work through these before reaching for a screwdriver. On a machine that has never been opened and is only a year or two old, one of them is usually the answer.
- Open Task Manager and sort by CPU. Identify anything holding double-digit CPU use at idle and deal with that process specifically rather than closing things at random.
- Trim startup programs from Task Manager’s Startup apps tab, so the machine isn’t loading background work you never asked for.
- Run a full malware scan. Windows Security is sufficient for this check.
- Install pending Windows updates and the graphics and chipset drivers from your laptop maker’s support page. Vendor firmware updates frequently change fan curves and power limits.
- Clear the intake and exhaust vents from the outside, and give the machine a hard surface with clearance underneath.
Windows 11 Power Settings That Affect Heat
Windows 10 reached end of support in October 2025, so the Control Panel power-plan routes written for it are no longer the path most readers will find. In Windows 11 the equivalent controls live in Settings.
Microsoft documents power mode at Settings > System > Power & battery > Power mode, with Best power efficiency as the setting that limits background activity and power draw. Screen and sleep timeouts sit on the same page under Screen, sleep, & hibernate timeouts, and Energy saver is there too.
Dropping from Best performance to Balanced or Best power efficiency lowers the power the chip is allowed to draw, and lower power means less heat. On a thin machine that throttles under sustained load, that trade often produces a more consistent result than letting it boost hard and immediately fall back.
Many vendors layer their own thermal profiles on top — Lenovo Vantage, MyASUS, Dell Power Manager, HP Command Center and the Armoury Crate family all expose quiet or cool modes that change fan curves directly. Check the utility that shipped with your machine before assuming Windows is in full control.
Undervolting and Why It May Not Be Available
Undervolting reduces the voltage the CPU requests at a given frequency. Less voltage at the same clock means less heat, which is why it was standard advice on 2022-era guides. On a lot of current Intel hardware it simply isn’t an option any more.
The reason is a security fix. The Plundervolt research targeted Intel’s voltage-adjustment interface to fault SGX enclaves, and the microcode mitigation locked voltage to default settings, which removed software voltage control on affected parts from Skylake onward. On many laptops the undervolt interface is disabled outright at the firmware level, and vendors do not expose a switch to turn it back on.
Intel also states directly that it does not provide undervolting controls, software or tools for locked non-K processors, and that system manufacturers set undervolt options in BIOS. If your laptop maker hasn’t exposed it, there is no supported route. AMD Ryzen laptops are generally more permissive here, with Curve Optimizer offsets available in some vendor BIOS implementations, but availability is still down to the specific machine.
Treat undervolting as a bonus if your hardware allows it, not as the plan. Cleaning and repasting deliver larger, more reliable gains on an older laptop.
Cleaning the Fan and Heatsink Safely
This is the part that actually fixes long-neglected machines. Dust does not sit loosely in a laptop cooler; it compacts into a mat against the fin stack at the exhaust, and that mat blocks airflow long before the fan itself looks dirty.
Never let compressed air spin the fan. Hold the blades still with a finger or a plastic tool before you blow anything at them. A fan driven far past its rated speed by an air jet acts as a generator, feeding voltage back down the tach and power lines toward the board, and the sleeve or ball bearing is being spun dry and unloaded at speeds it was never designed for. Also keep the can upright — tipping it sprays liquid propellant onto the board.
Before opening the machine. Shut down fully, unplug the charger, and disconnect the internal battery connector from the motherboard — powering off alone leaves parts of the board live. Wear an anti-static strap that is genuinely grounded, keep conductive tools away from the battery, and stop immediately if you find a swollen cell or burned components. A lithium pouch cell must never be punctured, bent or crushed.
Step by Step Fan and Vent Cleaning
Disassembly differs by model, so pull your machine’s service manual or an iFixit teardown for the specific chassis before you start. Some laptops have a service hatch over the cooler; others require the entire board to come out. The general sequence below holds across most designs.
- Power down, unplug, remove the battery if it is external, and disconnect the internal battery connector once the cover is off.
- Unscrew the back panel and set it aside with its screws kept in order — lengths often differ between positions.
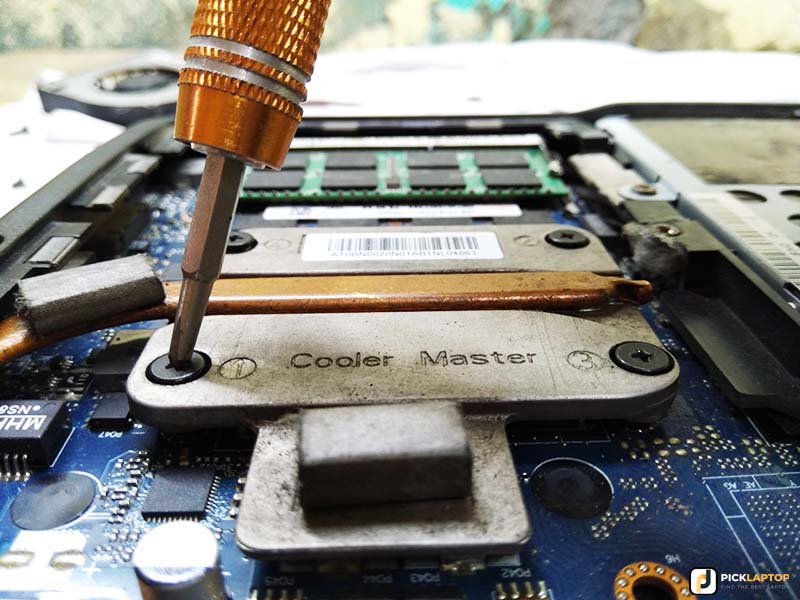
- Unplug the fan connector before lifting the fan, then unscrew the fan and heatsink assembly. Loosen heatsink screws gradually in the numbered sequence stamped on the bracket rather than fully removing one at a time.
- If the fan and heatsink are a combined unit, separate them so you can reach the fin stack from both sides. Expect small screws here.
- Hold the fan blades still, then clear dust with short bursts of air, a soft brush, or a vacuum held at the exhaust rather than pressed against the board. Follow with cotton swabs dampened in isopropyl alcohol for sticky residue on the blades and housing.
- Clear the fin stack and the intake and exhaust vents in the chassis. The fins are the part that matters most and the part most often skipped.
- Reassemble, checking that the fan connector is seated and no cable is trapped under the heatsink.
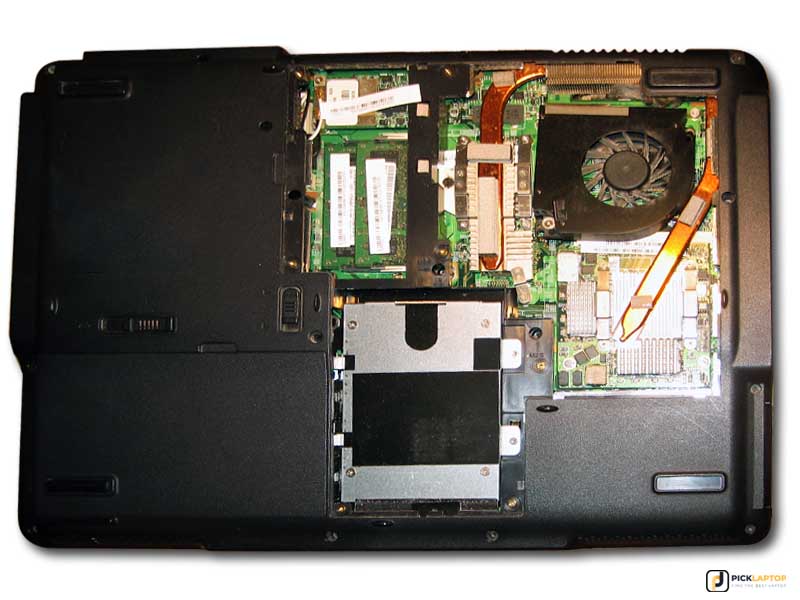
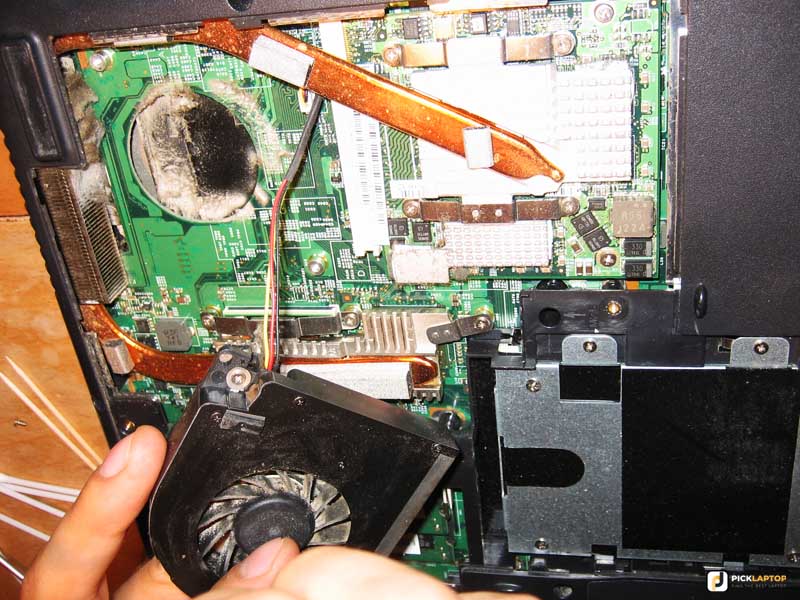
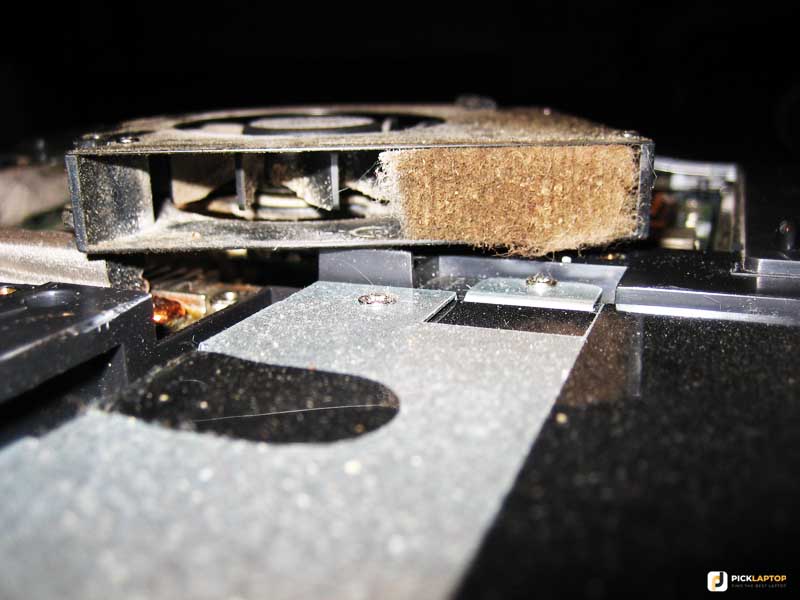
On some coolers the impeller lifts off its hub, which makes cleaning the housing far easier. It takes very little force — try a gentle upward pull, and stop if it resists rather than levering at it.
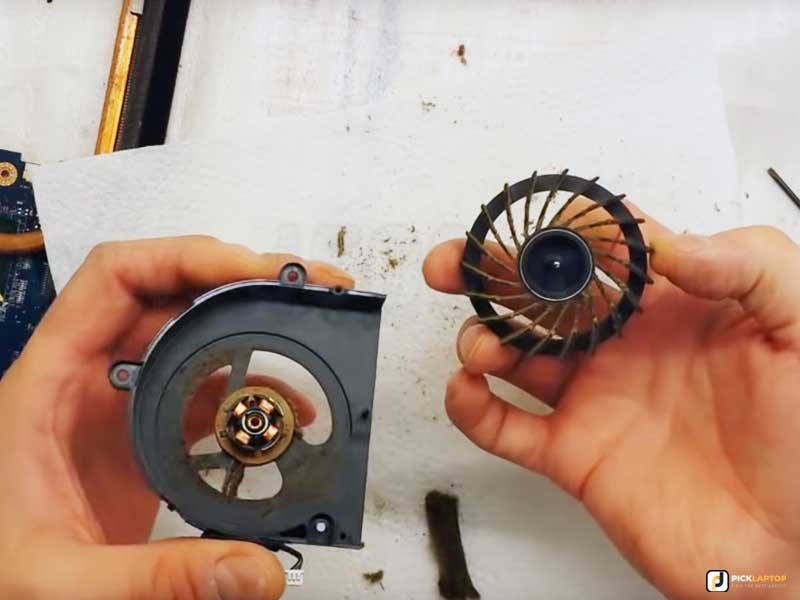
If the fan is noisy, grinding or stops intermittently after cleaning, the bearing is worn and cleaning will not bring it back. That is a replacement part, and our breakdown of what a laptop fan replacement costs sets out the difference between doing it yourself and paying a shop.
Replacing Thermal Paste and Thermal Pads
Once the heatsink is off, the paste has to be replaced. Removing and refitting a cooler on the old, disturbed paste layer leaves voids in the interface, and the machine will run hotter afterwards than it did before you touched it.
iFixit’s repasting guidance is to clean both the die and the heatsink contact face with isopropyl alcohol at greater than 90% concentration, then apply a small drop about the size of a grain of rice to the middle of the processor die and let mounting pressure spread it. Use plastic tools rather than metal on the die, apply paste to the chip rather than the heatsink, and let everything dry fully before reassembly.
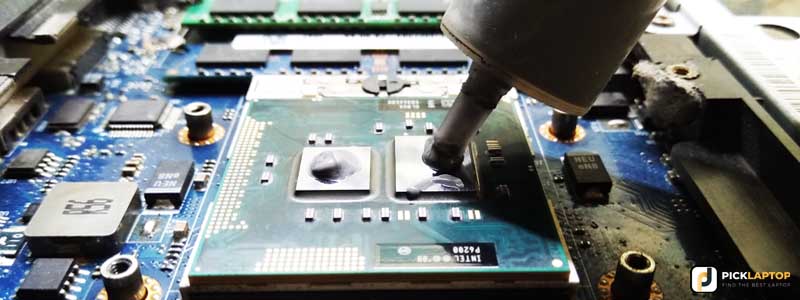
Two die-level details matter on laptops specifically. Mobile CPUs and GPUs are usually bare silicon with no heat spreader, so the die edges chip easily under a metal scraper and the contact area is small enough that a heavy paste application squeezes out onto surrounding components. Keep the drop modest and let the bracket do the spreading.
Tighten the heatsink screws in the sequence numbered on the bracket, a little at a time in rotation, rather than fully seating one corner first. Uneven clamping tilts the cold plate off the die and produces exactly the hot spot you were trying to remove.
Do Not Ignore the Thermal Pads
Paste is only part of the interface. The soft colored pads under the heatsink bridge the gap to VRM stages, memory packages and sometimes the SSD — iFixit notes these components use heat transfer pads instead of paste, and that damaged pads need replacing.
Pads compress and dry out with age, and an old pad that has taken a set no longer fills the gap it was sized for. Replacement pads must match the original thickness: too thin and they never make contact, too thick and they hold the cold plate off the CPU die. Measure or note the original before ordering, and don’t substitute paste for a pad — the gaps involved are far too large for it.
Power-delivery components running hot is a common cause of throttling that repasting the CPU alone doesn’t fix, which is why the pads are worth doing in the same session rather than as a second teardown.
Cooling Pads and Other External Measures
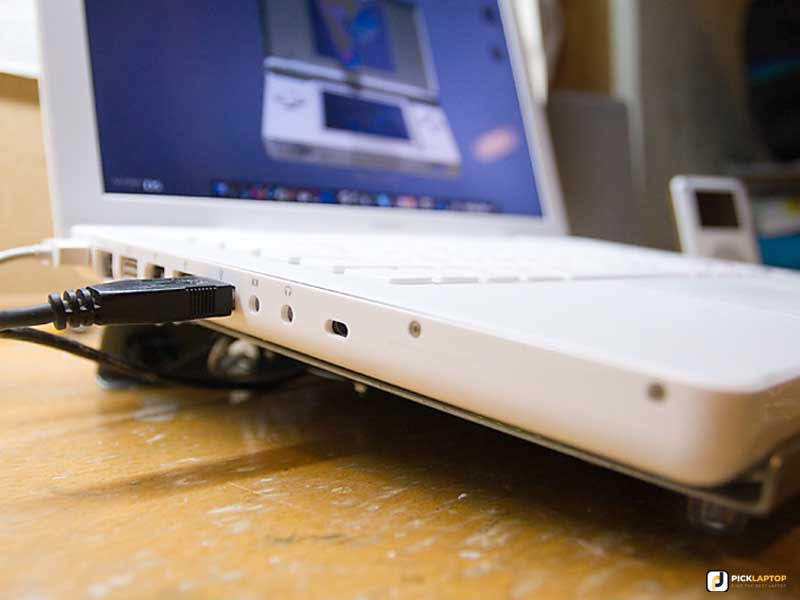
A cooling pad helps most where the laptop draws air from the underside and the surface it sits on is restricting that intake. Raising the chassis and feeding it cooler air can reduce temperatures, and the effect is largest on machines with bottom intake vents.
It helps far less on a machine whose fins are packed with dust or whose paste has failed, because the bottleneck there is inside the cooler, not outside it. Treat a pad as a supplement to cleaning, not a substitute for it.
Ambient temperature is the other external factor. A laptop pulling in 30°C air has a much smaller thermal headroom than the same machine in a 20°C room, and there is nothing internal you can change to make that up.
When Overheating Points to a Hardware Fault
Some symptoms are not cooling problems at all. A machine that shuts down under load within seconds while the heatsink is still cold to the touch has a heat transfer problem at the die, a failed sensor, or a fault in power delivery — not a dust problem.
A flattened or crushed heat pipe transfers almost nothing, and it is a common outcome of a drop or of a previous repair where the cooler was refitted badly. Held up to the light, a heat pipe should be round along its length.
Vendor hardware diagnostics are the quickest way to separate a sensor or fan fault from a genuine thermal one; most laptops have a built-in test suite reachable at boot, and our walkthrough of running diagnostics on a laptop covers where each brand hides it. If the fan is reported dead or the thermal sensor reads implausible values, stop cleaning and get the fault identified.
Why is my laptop heating up?
Usually because the cooling path is restricted — blocked vents, a dust-packed fin stack, dried thermal paste, or degraded thermal pads. Software can do it too: a process pinning the CPU keeps the chip at full power regardless of how clean the cooler is. Rule out the software side first, since it costs nothing.
How do I know if my laptop is overheating?
Heat alone isn’t the test. Look for performance that collapses under load, a fan stuck at full speed indefinitely, freezing, or unexpected shutdowns. Confirm it with a monitoring tool that shows temperature and clock speed together — a chip holding its boost clock at a high temperature is fine, a chip dropping below base clock is throttling.
Is it normal for a laptop to get hot?
Yes. Modern mobile chips are designed to run close to their thermal limit under load and pull clocks back when they reach it. Sustained high temperature at idle, or a blue screen, freeze or shutdown under load, is what indicates a cooling problem.
What temperature is too hot for a laptop CPU?
There is no single figure. Intel says the maximum operating temperature varies by processor and is usually between 100°C and 110°C, and points you to the Tjunction value on that specific chip’s specification page. Look up your exact part number rather than applying a number from a generic guide.
What happens if a laptop overheats?
The chip throttles first, so you lose performance. If temperature keeps climbing, firmware shuts the machine down to protect the hardware. Repeated hard thermal shutdowns are a sign the cooling has failed rather than a normal operating condition.
Can I use compressed air to clean my laptop fan?
Yes, but hold the fan blades still first. Letting the jet spin the fan drives it far beyond its rated speed, which stresses the bearing and can push voltage back into the board through the fan’s own wiring. Keep the can upright so it doesn’t spray liquid propellant, and use short bursts.
Does replacing thermal paste actually reduce temperatures?
On an older machine with a dried, cracked paste layer, it can make a substantial difference — and it is mandatory rather than optional whenever you remove the heatsink, because the disturbed layer will not reseal. On a machine only a year or two old with a clean cooler, expect much less from it.
Can I undervolt my laptop CPU to run cooler?
Only if your hardware still allows it. The microcode mitigation for the Plundervolt vulnerability locked voltage to defaults on affected Intel parts from Skylake onward, and Intel does not provide undervolting tools for locked non-K processors — that decision sits with your laptop maker’s BIOS. AMD Ryzen laptops are more likely to expose Curve Optimizer offsets, but it still varies by model.
Do cooling pads actually work?
They help most on laptops with underside intake vents, where raising the chassis and supplying cooler air genuinely lowers temperatures. They do very little when the restriction is inside the cooler — a dust-packed fin stack or failed paste is not something external airflow can compensate for.
Final Thoughts on Fixing an Overheating Laptop
Diagnose before you disassemble: check the load, check the chip’s own rated Tjunction, and watch clocks alongside temperature so you know whether you are fixing a real problem or a normal one.
When the fix is physical, the fin stack and the thermal interface are where the gains are. Disconnect the battery, hold the fan still, replace paste and pads together, and torque the heatsink evenly on the way back.



Holy crap! what did I find in my laptop, it’s really gross; it’s my first time I have opened my laptop.
Ha, that’s a pretty common reaction opening up a laptop for the first time! If you want a hand identifying what you’re looking at, or whether it’s something to actually worry about, feel free to describe it here.