Most people who need to erase a Windows 7 laptop are getting rid of it — selling it, donating it, handing it to a family member, or dropping it at a recycler. The goal is not tidiness. It is making sure nobody can pull your tax returns, saved passwords or photos back off the drive afterwards.
The advice that used to come with this question is now partly wrong. A machine of Windows 7 vintage might still have its original mechanical hard drive, or it might have had an SSD fitted at some point — and the correct way to wipe those two is not the same. Getting that distinction right is the difference between a drive that is genuinely clean and one that only looks clean.
Multi-pass overwriting is the wrong method for an SSD. Flash controllers remap writes across spare blocks, so a tool that overwrites every visible sector can leave the original data sitting in cells it was never able to address. Researchers at UC San Diego demonstrated exactly this failure mode on flash drives. On an SSD, use the drive’s own secure-erase or sanitize command instead.
What’s Inside
- 1 – Check Whether the Laptop Has an SSD or a Hard Drive First
- 2 – The Three Ways Data Actually Gets Destroyed
- 3 – How to Securely Erase an SSD
- 4 – How to Securely Erase a Mechanical Hard Drive
- 5 – Erasing a Laptop That Is Genuinely Still on Windows 7
- 6 – Pulling the Drive and Wiping It From Another Machine
- 7 – When Physical Destruction Is the Right Answer
- 8 – Reasons to Wipe a Laptop Completely
- 9 – Final Thoughts on Wiping an Old Windows Laptop Safely
Check Whether the Laptop Has an SSD or a Hard Drive First
Every decision below depends on this answer, and you cannot assume it from the laptop’s age. Plenty of Windows 7 machines had an SSD dropped into them years after purchase as a cheap speed fix.
- Open the Start menu and type defrag, then open Defragment and Optimize Drives (called Disk Defragmenter on Windows 7 itself).
- On Windows 8 and later, the Media type column reads either “Hard disk drive” or “Solid state drive”.
- On Windows 7, which predates that column, check the drive model in Device Manager under Disk drives and search the model number.
- If the machine will not boot at all, open the drive bay and read the label on the drive itself.
A mechanical drive is physically heavier, usually 7 to 9.5 mm thick with a spinning platter you can feel when you tilt it. A 2.5-inch SSD is silent and light. An M.2 stick is unmistakable.
The Three Ways Data Actually Gets Destroyed
Data sanitization means removing data so that it cannot be reconstructed, and it comes in three families. Every method further down this page is one of these three wearing a different name.
- Data erasure — overwriting the stored data, or issuing the drive’s own internal erase command, so the original contents no longer exist on the media.
- Cryptographic erasure — encrypting the drive, then destroying the key. The ciphertext remains and is useless without it.
- Physical destruction — shredding, crushing or degaussing the media so it cannot be read at all.
The standards that govern this changed recently. NIST published SP 800-88 Revision 2 in September 2025, and it no longer spells out sanitization techniques itself — it now directs readers to comply with IEEE 2883, NSA specifications, or an organization’s own approved standard, while expanding its guidance on cryptographic erase.
For a household laptop that matters less than the practical takeaway inside it: the modern recommendation is to use the storage device’s own sanitize command rather than to grind over it with a general-purpose overwriting tool.
How to Securely Erase an SSD
Option 1: The Manufacturer’s Own Toolbox
This is the cleanest route. SSD makers ship utilities that issue the drive’s built-in ATA Secure Erase or NVMe Sanitize command, which tells the controller to erase every cell it manages — including the spare area an overwriting tool cannot reach.
- Identify the SSD’s make and model in Device Manager, under Disk drives.
- Download that manufacturer’s utility — Samsung Magician, Crucial Storage Executive, WD Dashboard, SanDisk Dashboard and Kingston SSD Manager all include an erase function.
- Run the secure erase or sanitize operation. A drive cannot usually erase the volume Windows is currently running from, so most tools build a bootable USB for the purpose.
- Boot from that USB and let the operation complete. It typically takes seconds to a couple of minutes, not hours — that speed is normal and is not a sign it failed.
Option 2: Encrypt, Then Throw Away the Key
Cryptographic erasure sidesteps the flash problem entirely. If the whole drive was already encrypted, destroying the key renders every block on it unreadable, wherever the controller happened to put it.
Modern machines often arrive in this state without being asked. Windows 11 24H2 turns on device encryption by default on clean installs and reinstalls. A Windows 7 laptop almost certainly is not encrypted, but you can encrypt it first and then wipe, which gives you two independent reasons the data is gone.
Option 3: A Built-In Reset With Data Removal
If the laptop has been moved onto Windows 10 or 11 at some point, the operating system’s own reset can do the job. Go to Settings > System > Recovery > Reset PC on Windows 11 (Settings > Update & Security > Recovery on Windows 10), choose Remove everything, then open Change settings and switch Clean data on.
Microsoft is explicit about the limits of its own tool. The reset documentation states that “the data erasure functionality is targeted at consumers and does not meet government and industry data erasure standards”. Fine for selling a family laptop; not sufficient if the drive held regulated or genuinely sensitive material.
How to Securely Erase a Mechanical Hard Drive
On spinning platters, overwriting works the way the old advice assumed it did. Every logical sector maps to a fixed physical location, so writing over it genuinely replaces what was there.
A single full-drive overwrite pass is enough on any hard drive built in the last two decades. The seven-pass and thirty-five-pass routines that circulate online were designed for drive densities that no longer exist, and on a modern HDD they mostly consume time.
- Back up anything you want to keep. Nothing past this point is reversible.
- Boot the laptop from a wiping tool on USB, or pull the drive and attach it to another machine through a USB adapter.
- Run a single full-disk overwrite across the entire drive, not just one partition.
- Let it finish. A full pass on a 500 GB laptop drive is an hours-long job over USB 2.0.
Darik’s Boot and Nuke (DBAN) is the tool most often named for this and it does the job on mechanical drives. Its own project page has long carried the caveat that it does not reliably handle SSDs, which is the same limitation described in the warning at the top of this page. Bootable wiping tools that only understand overwriting belong to hard drives.
Erasing a Laptop That Is Genuinely Still on Windows 7
Windows 7 has no “reset this PC” of its own. What it has is the manufacturer’s recovery partition and the Backup and Restore control panel, and both still function on machines where the original recovery image survived.
A factory reset is not a secure wipe. Restoring a recovery image reinstalls Windows over the top of your data; it does not overwrite the free space where deleted files still live. If the laptop is leaving your hands, treat a recovery-partition reset as a starting point and follow it with a real erase.
HP Recovery Manager
- Restart the laptop and press F11 repeatedly as it powers on to reach HP Recovery Manager. It can also be launched from inside Windows if the machine still boots.
- Select HP Recovery Environment.
- Confirm the restart into the recovery environment when prompted.
- Choose System Recovery and follow the wizard. It deletes and recreates the partition, then redeploys the factory Windows image and drivers.
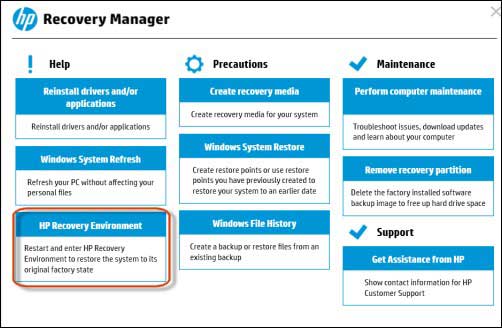
Image credit: hp.com
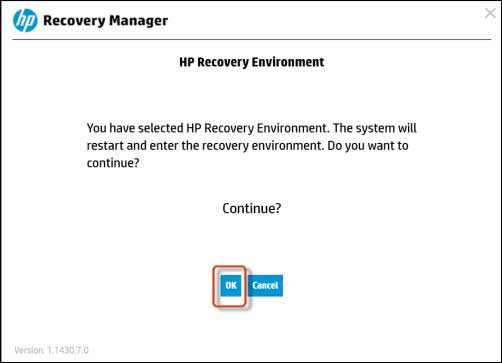
This only works where the recovery partition is intact. On a machine that has been reinstalled, upgraded or had its drive swapped in the intervening fifteen years, it frequently is not — F11 does nothing and there is no partition left to boot into.
Dell Factory Image Restore
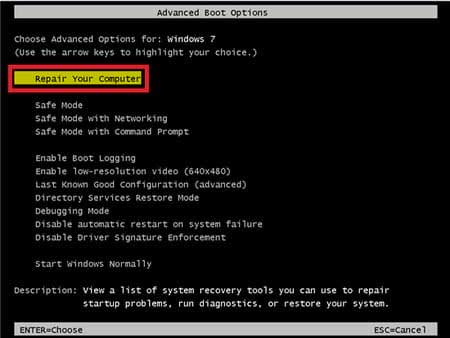
- Restart and press F8 before the Windows 7 logo appears.
- Select Repair Your Computer.
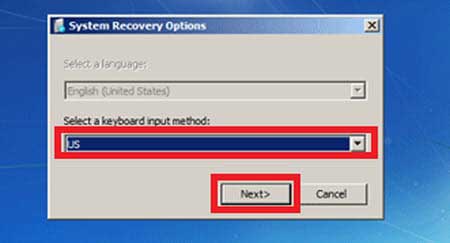
- Choose your keyboard input method.
- Sign in with an account that has administrator rights — the process will not run without them.
- Select Dell Factory Image Restore and follow the wizard.
The Windows 7 Backup and Restore Route
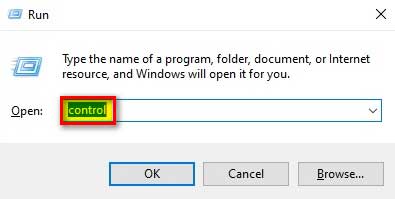
- Press Windows + R, type control and press Enter to open Control Panel.
- Open Backup and Restore.
- Under the restore section, choose Recover system settings or your computer.
- Select Advanced recovery methods.
- Pick between restoring from a system image, or reinstalling Windows from installation media.
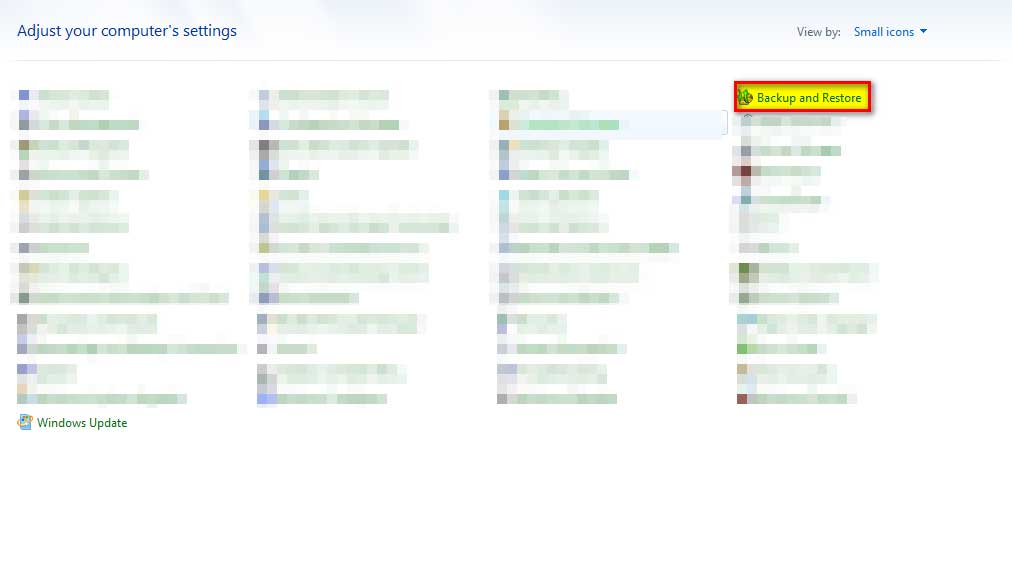
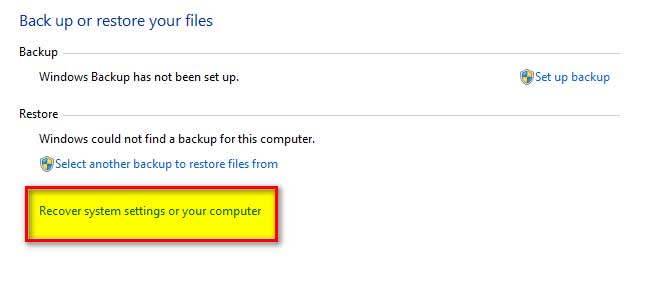
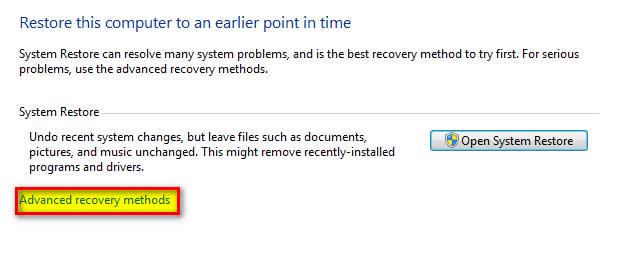
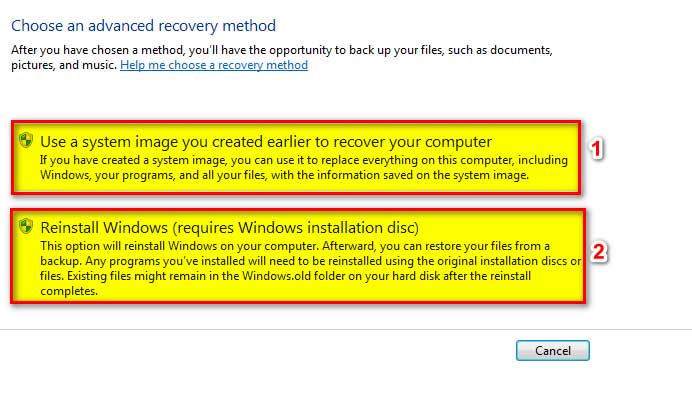
The system-image option restores the machine to whenever that image was captured, drivers and programs included. The reinstall option needs Windows 7 installation media, which is the step that stops most people — and pushes them toward simply wiping the drive and installing something current instead.
Pulling the Drive and Wiping It From Another Machine
Removing the drive and attaching it to a working computer is the most reliable approach when the laptop will not boot, and it is the only way to run some SSD manufacturer tools against the system drive.
- Power off, unplug, and remove the battery if it is removable.
- Open the drive bay cover and slide the drive out of its connector.
- Connect it to another PC with a USB-to-SATA adapter or an external enclosure.
- Wipe it with the method that matches the drive type — sanitize command for an SSD, single overwrite pass for an HDD.
Note that formatting a drive from another machine is not the same as wiping it. A standard format rewrites the file table and leaves the file contents in place, recoverable with tools anyone can download.
When Physical Destruction Is the Right Answer
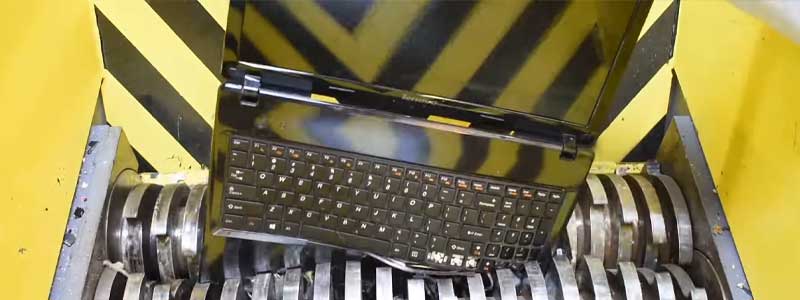
If the drive is dead, the laptop will not power on, or the contents were sensitive enough that you want no residual doubt, destroy the media. It is the one method that does not depend on a controller doing what it was asked.
- Shredding or crushing — a mechanical shredder reduces the media to fragments. This works on both hard drives and SSDs, though flash needs finer particles than platters do, since a surviving chip fragment can still hold readable data.
- Degaussing — a strong magnetic field scrambles the magnetic domains on a hard-drive platter and destroys it as a working device.
Degaussing does nothing to an SSD. Flash memory stores charge in cells, not magnetic orientation, so a degausser that reliably destroys a hard-drive platter leaves an SSD’s data completely intact. Never accept degaussing as proof that flash media was sanitized.
Destroying the drive and recycling the rest of the laptop are compatible goals. Most electronics recyclers will take the machine without its storage, and handling the disposal properly keeps a working chassis out of landfill even when the drive is not coming back.
Reasons to Wipe a Laptop Completely
- Selling, donating, trading in or recycling the machine.
- A malware infection you cannot be confident you have fully removed.
- Windows itself has become unstable enough that repair is no longer worth the effort.
- Passing the laptop to someone else within a household or a business.
- Repurposing the hardware for a different operating system.
The first of those carries the highest stakes. If the machine is heading to a buyer, a trade-in desk or a pawn shop counter, it is going to a stranger, and the wipe is the only thing standing between them and everything on the drive.
Does a factory reset erase everything on a laptop?
Not securely. A factory reset reinstalls Windows and removes your files from view, but on a mechanical drive the underlying data often remains in free space and can be recovered with ordinary undelete tools. Use a reset for convenience and a real erase for security.
Is a multi-pass wipe better than a single pass?
Not on a modern hard drive. One full overwrite pass is sufficient on any HDD built in the last twenty years; the seven- and thirty-five-pass routines are holdovers from far lower-density media. On an SSD the pass count is beside the point, because overwriting is the wrong technique there regardless of how many times you repeat it.
How do I know whether my laptop has an SSD or a hard drive?
Open the Optimize Drives tool from the Start menu and read the Media type column, which says “Solid state drive” or “Hard disk drive”. On Windows 7, which lacks that column, look up the drive model shown in Device Manager under Disk drives, or read the label on the drive itself.
Why did my SSD secure erase finish in seconds?
That is expected. A secure erase or sanitize command tells the controller to clear its cells or discard its encryption key rather than writing over hundreds of gigabytes, so it completes almost instantly. Speed is not evidence that it failed.
Can I use DBAN on an SSD?
You can run it, but you should not rely on it. DBAN works by overwriting sectors, which is a good match for mechanical drives and a poor one for flash, where the controller can hold data in spare blocks that an overwriting tool never sees. Use the SSD maker’s own secure-erase utility instead.
Is removing the hard drive enough before selling a laptop?
It solves the data problem completely and creates a pricing one — a laptop sold without storage is worth noticeably less and appeals to a much smaller pool of buyers. If you would rather keep the drive, keeping it is the safest option available. If you want the sale price, wipe the drive properly and leave it in.
What about a laptop that will not turn on at all?
Remove the drive and deal with it directly. Attach it to another computer with a USB adapter and wipe it there, or destroy it physically if it is unresponsive. A dead laptop is not a wiped laptop, and drives frequently outlive the machines they were fitted to.
Final Thoughts on Wiping an Old Windows Laptop Safely
Identify the drive type first, then pick the matching method: the manufacturer’s secure-erase command on an SSD, a single full overwrite pass on a hard drive, and physical destruction whenever the drive is dead or the contents were too sensitive to leave to a controller’s good behavior.
The one habit worth breaking is treating a factory reset as a wipe. It reinstalls the operating system; it does not sanitize the media underneath it.