Laptops are becoming an essential part of our daily life. We spend a lot of time around these gadgets, but the problem arises when these devices get old and do not remain helpful for us. In such situations, we can either reuse these laptops by performing a fresh installation or donate them or recycle them.
But before taking any such decision, we must assess our need whether the laptop is still fit for its purpose or not. If it is too old that new software is not supported, then we have two options left: donate or recycle them.
Donating a laptop is an excellent option as a device that is not usable for us might help some underprivileged. But before granting the laptop, we should consider that some organizations require a working condition device. So if repairing an appliance is beyond economic condition, we must go for the recycling process. There are many other reasons we should recycle our laptops that will discuss later in this article. In both the situations we have to take some prerequisites such as
- Backup the Data
- Deauthorize
- Data Sanitization
- Removal of Peripheral
- Battery Removal
- Laptop recycling
This procedure is Microsoft environment specific and will be valid on devices with Microsoft-based operating systems only, especially for Windows 7.
Before moving on any further, let’s investigate why we need to recycle the laptops such as HP laptops, Dell laptops, etc.
Why do we need to recycle laptops?
As we have already discussed, laptops play an important role these days. So, there are various conditions in which we recycle a laptop. Some of the reasons are as follows:
- When we cannot sell, donate or write off our Laptop.
- When the Laptop has technical issues
- When the laptop becomes outdated
- When we are switching to a new device
- When we want to earn some extra bucks
- When we want to crush them environmental friendly way
So, above are some conditions in which we need to recycle our laptops.
Procedure:
Recycling a laptop is a complex process that requires step by step procedure. We have to perform each step carefully as the laptop may contain some essential information, personal, professional, and confidential which we don’t want to share with anyone.
The procedure of recycling the laptop comprises on following steps:
- Data Backup
- Deauthorization
- Data Sanitization
- Removal of peripherals
- Battery removal
- Laptop Recycling
We must follow the above steps in the correct sequence to avoid unforeseen situations. Now let’s explore the steps one by one:
What’s Inside
Step # 1: Data Backup
Data is the most critical asset for any organization or even for individuals, so we need to first take the backup of the data present over the Laptop. We have a couple of options available for taking a complete backup concerning media and concerning software, such as
- Cloud-based backup: On cloud-based backup, we have several options available such as iCloud, google drive, dropbox, one drive, Mega, etc. All these services provide us with hefty space to upload our valuable data over their servers and access them from anywhere over any device. All the services offer free as well as premium accounts.
- External drive backup: If we have a bulk amount of data and do not want to get into the hassle of segregating it when recycling the Laptop, we can opt for the external drive option. We have many options available in this category, such as Western Digital, Seagate, Transcend, Lacie, etc. All these drives provide a variety of storage capacities from 100s of GBs to TBs.
- CD/DVD/BluRay: Another way of taking backup is by writing the data over some optical medium. The optical media provides GBs to TBs of storage and can store them in a safe place. Still, the significant disadvantages of this technology are: it is time-consuming, scratch-prone, can require multiple media for large storage needs, and is a costly solution.
- Flash drive: We can also take backups on flash drives, but they offer us small storage capacity, can be misplaced easily, and are not durable. It is only fit for small storage requirements and a short period.
- NAS backup: It is a network and server-based storage solution that can access over wired or wireless connectivity. Although this is one of the most reliable solutions, it is costly and not recommended for individuals’ laptops.
- Tape drive: Another commercial solution that is good for organizational laptops. We can store TBs of data on a single tape that resides there for a very long period. But this solution is costly and only recommended for commercial use.
- Over another laptop: This is a straightforward solution; we take the backup on another new laptop while recycling a laptop. We can do this with the help of connecting both the laptops over a network or by some external media such as a flash drive or portable hard drive. The recommended procedure is with the help of network connectivity due to its fast and reliable data transfer rates.
Once we have identified the required media on which we want to take a backup now, let’s discuss the procedure of backups. We have a couple of options available for this:
- Manual backup
- Windows built-in backup utility
- With the help of third party software
- Windows image backup (Acronis true image)
Manual backup: In this backup procedure, we need to connect the external media or any other media from the categories mentioned above and just copy and paste our required files over it. It is a time-consuming solution but can successfully transfer all data as we are doing it ourselves.
We can also automate this procedure with the help of a powershell script or batch script. For this, you need to follow the below steps:
Step # 1:
Go to “Run” by pressing Windows + R button on the keyboard
Step # 2:
Type “cmd” and press “Enter key”
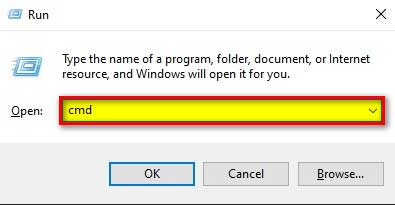
Step # 3:
A new window of “Command Prompt” will open.

Step # 4:
Once we are in the command prompt, we can use either “XCopy” or “RoboCopy” to automate our manual folder backups. The syntax of both the commands is as follows:
xcopy a: b: /s /e /h
Where a: and b: are the drive letters for source and destination paths, respectively /s /e /h are the parameters used to specify a specific job.
Or
robocopy <source> <destination>
Where source represents the source path and destination represents the destination path.
We recommend using robocopy as it mirrors a folder rather than just copying it. It also solves the long path or filename issue while mirroring a folder.
Windows built-in backup utility: Windows also provides a method to take the backup of the critical files present over the laptop, so we should utilize it before going into the recycling process. For this, we need to follow the below steps:
Step # 1:
Attach the external drive with the laptop
Step # 2:
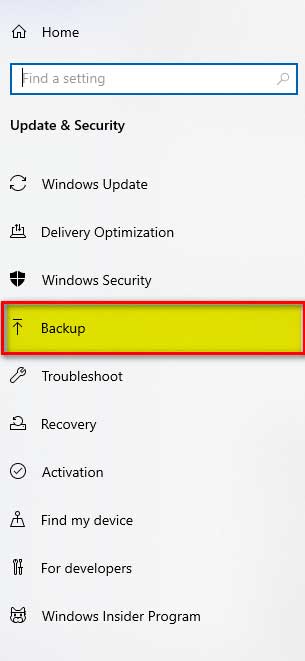
Go to “Settings” by pressing the Windows button, then select wheel icon

Step # 3:
Now select “Update & Security” option

Step # 4:
In the left pane we will see “Backup” option
Step # 5:
Once we have selected the “Backup” then in the right pane we will see “add drive” option
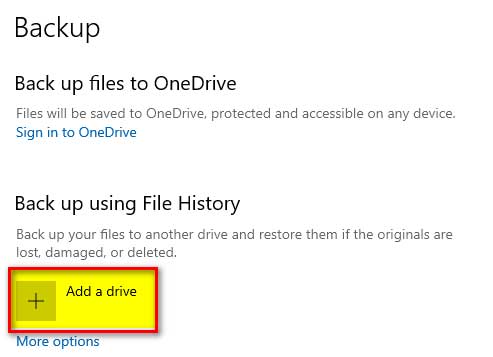
Step # 6:
After adding the drive attached to a laptop, we will select the “more options” where we can choose the folder which we want to backup, the backup schedule, and backup retention. Once done, we will select the “Backup Now” button, and we are good to go.
With the help of third party software: We can also take the backup with the use of third party software which is specialized in taking backups, such as:
- Symantec backup exec
- Easus Todo Backup
- AOMEI Bacupper Standard
- Cobian Reflector
- Comodo backup
There are many other tools present that can perform similar functionality.
With the help of Acronis True Image: If we want to take the whole image backup of the Windows operating system, then Acronis true image is the best solution. It offers backups, disk imaging, and anti-malware. It is one of the best options for operating system migration.
Step # 2: De Authorization
It is an important step that we must consider before donating or recycling our laptops. Some services limit our number of licenses, such as Microsft office 365, Microsoft Visio, Microsoft Project, Adobe creative suite, etc.
In such conditions, we must de-authorize the device before recycling it. For this, every software provides its procedure such as in Adobe Creative Suite, we need to perform the following
- Go to Help
- Click Deactivate
- Click Deactivate Permanently
Similarly, we can deactivate the license of Microsoft office 365 and other software.
Step # 3: Data Sanitization
Data is the most important factor which requires our extensive attention, as we have backed up all our required data; now, we need to remove it from the laptop which we are going to recycle or donate so that it cannot be miss used.
Data sanitization is the complete removal and erasure of data from any device permanently, irreversibly, and with our consent. While erasing or sanitizing the data from a device, we must make sure that the data has been removed so that it won’t get recovered.
We can perform data sanitization by the following methods.
- Physical Destruction
- Cryptographic Erasure
- Data Erasure
Physical Destruction is the process of destroying hard drives, smartphones, tablets, printed papers, laptops, or any other media, that contains data with the help of a mechanical shredder, a hammer, a powerful magnet, or any other means in such a way that data becomes irrecoverable and media is permanently damaged.
Cryptographic Erasure destroys data by performing a 128-bit or more encryption and erasing the decryption key that can use to decrypt the data. In this way, data becomes irrecoverable and is of no use to anyone. The activity is performed by specialized encryption software.
Data Erasure is a method of overwriting data with the help of specialized software. Data becomes irrecoverable as the original data have been overwritten on the storage devices.
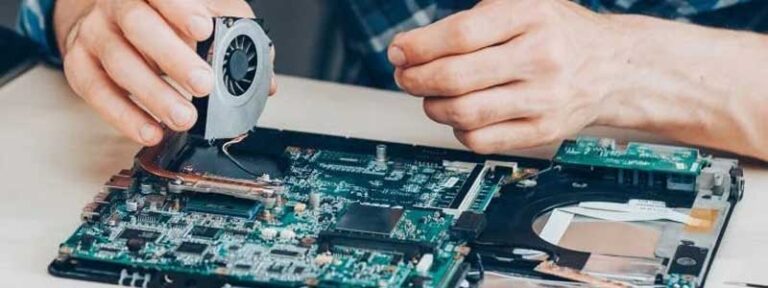
Step # 4: Removal of Peripherals
Before recycling the laptop, we must dismount all the laptop’s external peripherals, such as webcam, external keyboard & mouse, presenter, speakers, etc. If these devices are not damaged or old enough, we can either donate them or reuse them, so dismounting them from the recycling laptop is a good idea.
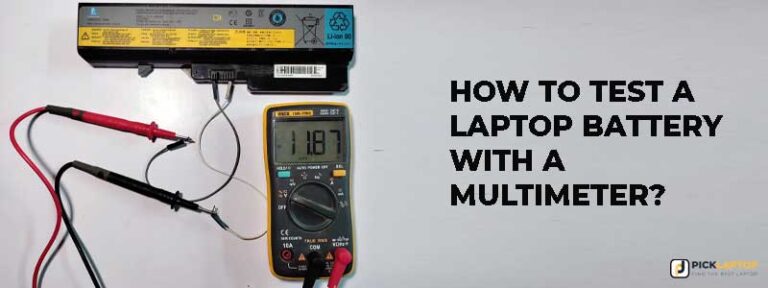
Step # 5: Removal of battery
Although we can recycle the whole laptop at once, it is reasonably necessary to take preventive measures while recycling the battery. So we recommend recycling it separately and following the below steps.
- Cover the battery terminals to avoid the risk of short-circuiting.
- Put the battery in a separate container to avoid contact with battery terminals with metal.
- If we can’t remove the battery, we have to pad them to eliminate the accidental activation.
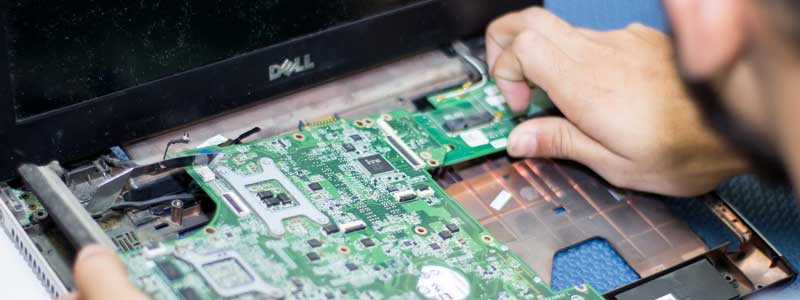
Step # 6: Laptop Recycling
After taking all the safety measures, from data security to safely removing the battery, we can now recycle the laptops. We can recycle a laptop by the following means:
- Hire a specialized service provider.
- Trash it by our self
- Put it in the mechanical shredder
Recycling the laptop involves the following steps:
- Collection
- Sorting
- Test for Potential reuse
- Manual disassembly
- HDD or other data container destruction
- Separation into the material composition
- Reuse
Closing Statement:
This article has tried to cover all major points of recycling a laptop. In our opinion, the best way to recycle it is with the help of a specialized service provider but after altogether and irrecoverably erasing the data.
References:
- Laptop Recycling: Read This Before You Recycle Your Laptop (greencitizen.com)
- How to Recycle Laptops Safely and Responsibly (treehugger.com)
- How to Recycle a Laptop (lifewire.com)
- Laptop Disposal Guide: How to Recycle It or Get Rid of It Safely | Laptop Mag
- How to recycle or donate your laptop – Reviewed