Printing is an essential function that can be carried out to get a hard copy of any image or text. Usually, we do print with the help of a printer, but this certainly does not means that we do not print with any other devices. There are many devices that perform printing, such as Plotters, Letter Press, Panaflex printers, etc.
As far as small office and home printing is concerned, we have many solutions for that, such as
- Dot Matrix Printers
- InkJet Printers
- DeskJet Printers
- BubbleJet Printers
- LaserJet Printers.
- Designjet Printers
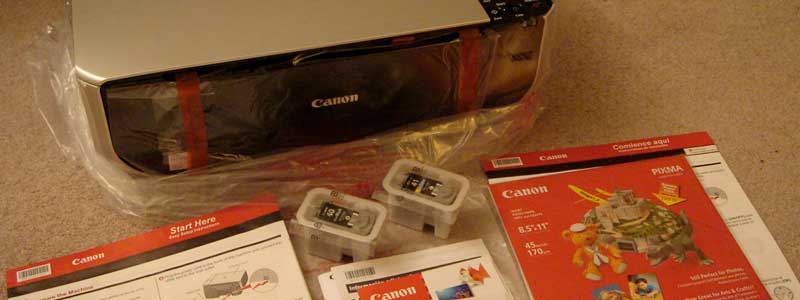
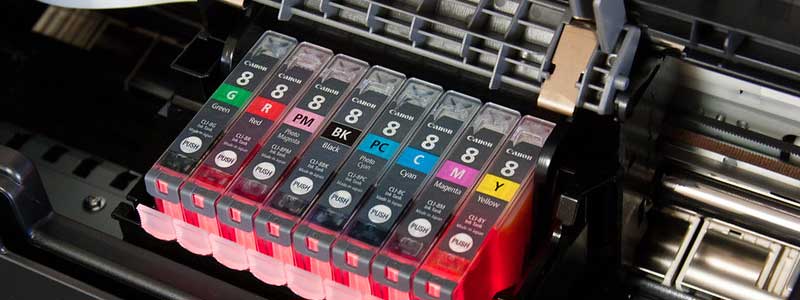
There are many manufacturers or brands which provide printers with the aforementioned technologies. Cannon is one of the largest printing solution providers and is the top choice of millions of users worldwide.
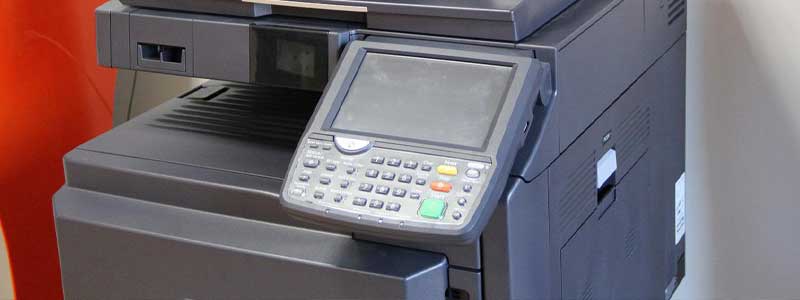
Canon is known for providing ultimate printing solutions from inkjet printers to multi-function printing machines. With the advancement of technology, Canon has jumped into wireless fidelity, and now they are providing wireless printing devices which are equally beneficial for printing from desktops, laptops, mobile phones, and tablets.
These wireless printers connect to the available WiFi networks and allow us to print from any device. The benefit of using a wireless printer is that we can avoid a jumble of cables that looks messy. At times these cable becomes frustrating and annoying and get large area. Another disadvantage of using wired solutions is that we can only print from some specific devices due to cable connectivity. Although we have multiple options in wired printing solutions such as:
- Serial port printing
- Parallel Port Printing
- USB Printing
- RJ 45 Printing
But as we have discussed that we are fortunate enough who born in the wireless age, and now we can avoid these cables. Before moving any further, let’s discuss some of the benefits of wireless printings. So, the following are some of the advantages of using wireless printing solutions
- Mobility
- Accessibility
- Multifunctional
- Convenience
- Cost-Effective
Another advantage of using the wireless printing solution is that we can equally print from any device. So let’s deep dive into the solution of connecting a canon printer with a laptop wirelessly.
Note: This procedure is Microsoft environment specific and will be valid on devices with Microsoft-based operating systems only.
But before going into the procedure, we will first see the situation in which we want to connect the printer with the laptop wirelessly.
Why do we need to connect the Canon Printer with Laptop Wirelessly?
There are many conditions in which we want to connect a Canon printer with any laptop with the help of a wireless medium. Some of the reasons are as follows:
- When we want to avoid scattered cables.
- When we want to cost (to avoid network cabling).
- When we want mobility
- When we want to use it with many devices conventional and non-conventional such as mobile phones.
- When we want to save space on our desks.
So, above are some of the conditions in which we can connect canon printers with our laptops or any other device wirelessly.
Procedure:
As we have seen that there are many situations due to which we need to connect the canon printer wirelessly with the laptop.
Now let’s explore the methods one by one:
Method # 1: Connecting the Canon printer with WIFI manually
Although Canon manufactured a number of models which supports wireless printing, and every such printer has its own option of connecting wirelessly but the philosophy is the same so we are going to cover a more generic way of connecting Canon Printer with the WIFI :
Step # 1:
First thing first power on the Canon printer by pressing the “Power Button”.
Step # 2:
Now go to the LCD panel of the Canon printer
Step # 3:
Under the LCD there is a setting button with the “Pliers and screwdriver” icon
Step # 4:
Now by pressing the arrow keys on the Canon printer’s keypad, move to the “Wireless Lan” menu and press the “OK” button
Step # 5:
Now once we have reached the “Wireless Lam” menu, the next thing is to locate “Manual Connect,” which we locate with the help of arrow buttons
Step # 6:
By selecting the “Manual Connect”, the Canon printer tries to search the available WIFI broadcasting devices
Step # 7:
Once it has found a strong WIFI broadcasting network, the printer shows it to us, but what if it is not our required network then no need to worry about we just switch between all the network names broadcasting at the moment by pressing the arrow keys
Step # 8:
After reaching our required WIFI network name, we need to press the “OK” button.
Step # 9:
Now at this step, it will ask the “WEP Key” for authentication.
Step # 10:
For entering the “WEP KEY” we have an alphanumeric keypad on the Canon printer. All we need to press is the “Back arrow” button to type alphabets and if we want to enter the letters in uppercase, then we need to press the “*” button, and if we want to enter the numbers, then we again need to press the “*” button and “#” for symbols.
Step # 11
Once we are done entering the password, press the “OK” button
Step # 12
Now the printer sends the authentication details to the router and once the router approved the authentication details the printer shows a connected message over the LCD.
Step # 13
To check the printer status whether it is connected with the WIFI or not press the “Pliers and Screw Driver” button this will show the WIFI and its signal bar icon.
Method # 2: Connecting the Canon printer with WIFI via WPS
We have seen how to manually connect the Canon printer with the WIFI but the above method is too lengthy and difficult. Another method that is easy and quite straightforward is connecting the Canon printer with WIFI via WPS. For this we need to follow the below steps:
Step # 1:
Turn on the Canon printer by pressing the “Power Button”.
Step # 2:
Now press the “Pliers and Screw Driver” button.
Step # 3:
This will bring us to the “Setup menu”.
Step # 4:
Select “Wireless LAN Setup” and press “OK”.
Step # 5:
From here toggle between the options by pressing “Forward Arrow Key”.
Step # 6:
Once we have found the “WPS (Push Button)” option, push the “OK” button next to the arrow key.
Step # 7:
The Canon printer shows a “Connecting” message on the screen.
Step # 8:
Now we need to bring the wireless router near to the printer and press and hold the “WPS” button.
Step # 9:
Once the power button on the WIFI router starts fleshing then we move on to the Canon printer screen where will see the message “Connected”.
Step # 10
At this stage, we press the “OK” button and to check the printer status whether it is connected with the WIFI or not press “Pliers and Screw Driver” this will show the WIFI and its signal bar icon. If this is the condition this means we have successfully connected with the router.
Method # 3: Connecting the Canon printer with WIFI via APP
The above methods are not enough we have another card in our sleeves to connect the Canon printer with WIFI, which is via Cannon APP.
Step # 1:
If we have an android smartphone then we need to go to the “Play Store” or in the case of an IOS phone go to “App Store”.
Step # 2:
From here, we will download the “Canon InkJet Selphy” app.
Step # 3:
We will download and install the app on our mobile phones by pressing the “Install” button.
Step # 4:
Once the app is installed on our mobile phones, then we will give it the appropriate permissions and location information.
Step # 5:
Now we will move on to the printer and press the “Pliers and Screw Driver” button.
Step # 6:
Move on to the “Wireless LAN Setup” and press the “OK” button
Step # 7:
The screen shows “Easy WL Setup” we will press the “OK” button again.
Step # 8:
The screen shows “Processing,” after which it shows “Follow the instruction on PC/Mobile Phone,” so we move on to our smartphone.
Step # 9:
On the smartphone, we will open the app which shows us the message “Do you want to search for available printers”.
Step # 10:
Here we press the “OK” button and the app will search the broadcasting printer
Step # 11:
Once the app finds the required printer, we press the “OK” button. It asks to connect to the device
Step # 12:
Now this will display us the WIFI router list. From here we will select our desired router with which we want to connect the Canon printer.
Step # 13:
At this screen, we need to enter the WIFI password which the app will send to the Canon printer.
Step # 14:
Once the password is saved in the printer it will display “Easy WL setup” is connected now press “OK”.
Step # 15:
To confirm the printer status whether it is connected with the WIFI or not we press the “Pliers and Screw Driver” button this will show the WIFI and its signal bar icon.
Now as we have seen all the methods to connect the Canon printer with the WIFI network but we are not done yet. We have only completed the half-mile. The next step is to connect the printer with the laptop.
Connecting the printer with the Laptop-The driver Installation
After connecting the printer with the WIFI now we need to install the printer driver so that it can communicate with the printer correctly and process our print jobs. To install the right driver we need to follow the following steps:
Step # 1:
To install the correct driver for our Canon printer we can put its CD into the CD ROM or we can download the driver directly from Canon’s website.
Step # 2:
Once we have the correct driver, we will start the setup wizard and click “Next”
Step # 3:
On the license agreement screen, press “Yes.”
Step # 4:
On the next screen, we will select “Network Connections” as we are connecting a wireless printer
Step # 5:
Now we will follow the wizard to complete the setup and if everything goes fine we are good to print our documents on the Canon printer.
Closing Statement:
In this article, we have tried to cover all the methods connecting the Canon printer with the laptop. In our opinion, the WPS method to connect the Canon printer with the WIFI is the simplest and easiest one, so people with less technical knowledge can follow this method.
This certainly does not mean that people cannot follow the other methods, they are straightforward too but some people might find them a bit difficult. Anyhow, we have tried to explain all the steps in easy-to-understand language.
Hope the readers find this article interesting, Informative, and engaging.
References:
- How to Setup Canon Wireless Printer | Wireless Setup | WiFi Setup (printersupportplus.com)
- How to Connect Canon Printer to Laptop? +1-820-333-4168 (printersupportplus.com)
- How To Connect Canon Printer To Laptop ? (Wired & Wirelessly) (wethegeek.com)
- How to Connect Canon Printer to Laptop? – TechnoWifi
- 2 Steps to Set up Canon Printer (With Pictures) – Driver Easy