Are you tired of your laptop’s slow performance? Replacing its processor with a new one can dramatically boost performance. But is it possible to upgrade/replace a laptop’s processor in 2026? Unfortunately, the answer is mainly no! Because nowadays most laptops come with a soldered CPU.
But it used to work flawlessly, as I did back in 2022 with one of my laptops. I upgraded my Lenovo G560 laptop’s processor from a 2.13GHz Pentium to a 2.40GHz Intel Core i5, which raised CPU Benchmarks from 1349 to 2368. But this upgrade isn’t for the fainthearted because it requires advanced skills.
If you’re curious how to install, replace, or upgrade your laptop processor, this guide will get you covered.
My Recommended Laptop Toolkit!

Last update on 2026-07-11 / Affiliate links / Images from Amazon Product Advertising API
Before removing a single screw, make sure your laptop supports a processor upgrade. Moreover, the processor you choose to upgrade is compatible with the laptop’s motherboard.
To understand this process, I will share my own upgrade process for a Lenovo G560 laptop; it’s an Intel P6100 model with 2GB of memory, a 250GB HDD, and Intel HD graphics. And we will upgrade its CPU to i5-430M.
What’s Inside
- 1 – How to Find a Compatible Replacement for Your Old Laptop's Processor Upgrades?
- 2 – Steps to upgrade a laptop processor in 2026
- 3 – Step 1: Update the BIOS
- 4 – Step 2: Remove the Battery
- 5 – Step 3: Remove the Back Cover
- 6 – Step 4: Remove the Keyboard
- 7 – Step 5: Remove the Upper Shell
- 8 – Step 6: Remove the Display Assembly
- 9 – Step 7: Remove the Heatsink
- 10 – Step 8: Replace the CPU
- 11 – Step 9: Apply Thermal Paste and Reassemble
How to Find a Compatible Replacement for Your Old Laptop’s Processor Upgrades?
1. The most straightforward way to do it is to Google “[your notebook model] CPU” – It tells you which CPUs have been sold with your laptop during its lifespan.
2. It’s not the whole story; you should also take a look at the laptop’s service manual. In the specification section, list all the processors the computer was available with.
For Instance, I downloaded the Lenovo G560 service manual and found that it was also available with the P6200, i3-380M, and i5-430M processors.
3. You should also visit the official forum of the manufacturer to know which processor has worked for other users with your laptop model.
For instance, on the Lenovo forum, one user has confirmed that the “Intel i3-380M” processor worked well.
Usually, if you have a slim and compact laptop, there are higher chances that it has a soldered CPU, and you won’t be able to upgrade. Even some notebook comes with soldered memory (RAM).
If you’re sure the processor you choose is listed in the service manual and that some users have already tested it with your laptop model, you can proceed.
So, let’s get ready with the tools to upgrade your laptop processor.
Steps to upgrade a laptop processor in 2026
Step 1: Update the BIOS
It’s the most critical step before even taking a peek into the laptop’s internals. You have to make sure your system has the latest BIOS version; manufacturers sometimes release updates to support newer CPUs.
It’s essential because if you install a chip that your BIOS doesn’t support, your system won’t even boot. You can check the latest BIOS version for your laptop in the support section of your manufacturer’s website.
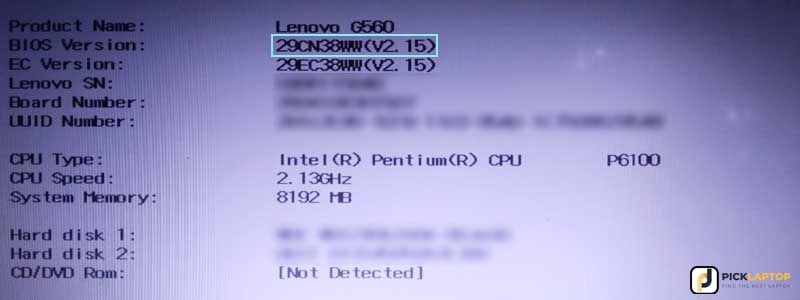
For Instance, the most recent BIOS version of Lenovo G560 is 29CN38WW, according to the manufacturer’s website, and we have updated it as well (see picture).
I am assuming that you have updated your laptop’s bios to the latest, and you’re ready to open your notebook. Wait, did you wear the antistatic wrist strap to protect the internal hardware? Trust me, you don’t want to regret doing everything “right.”
Got everything; let’s go to the next step.
Step 2: Remove the Battery
All laptops have different designs, but most of the steps are identical when opening any notebook. I have taken the Lenovo G560 laptop for demonstration, which has a single back cover to access the memory module, hard drive, and processor.
As you have already downloaded the service manual, and it has all the steps, it won’t be a problem if you have a different laptop.
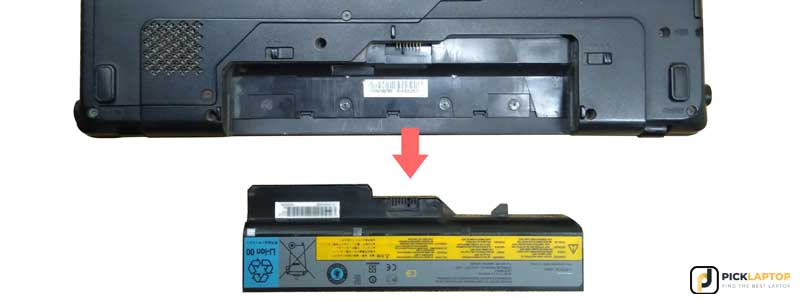
Removing the battery and dummy card is the first thing to do. However, if your laptop has an inbuilt battery, you can remove it later.
Note: Laptops with built-in batteries require greater caution when opening, as some of the motherboard remains powered. A single screw falling onto the circuit can cause severe damage.
Step 3: Remove the Back Cover
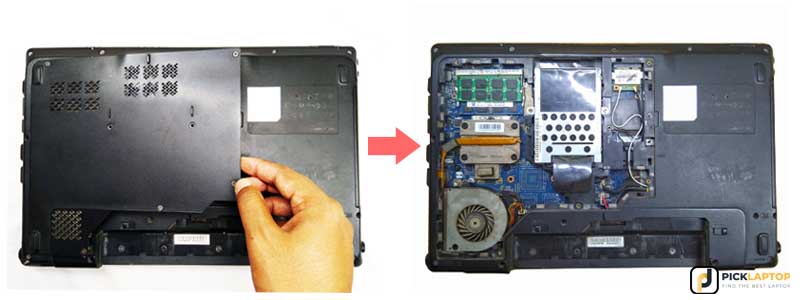
As you have already disconnected the internal and external power sources, it’s now time to use a screwdriver to remove the back cover.
In my case, I can now access the processor, as you can see, I don’t have to open it anymore. But if you have a different model, I will tell you some common steps for disassembling your notebook.
Despite removing the back panels, you still can’t see the processor, so you have to take apart the upper part as well. Before going to the next step, you have to remove all the screws on the backside.
Note: On some laptop models, screws may be hidden under the rubber cover, so make sure to remove them before proceeding to the next step. Moreover, if the hard disk drive or any component is out of place, you should remove it as well.
Step 4: Remove the Keyboard
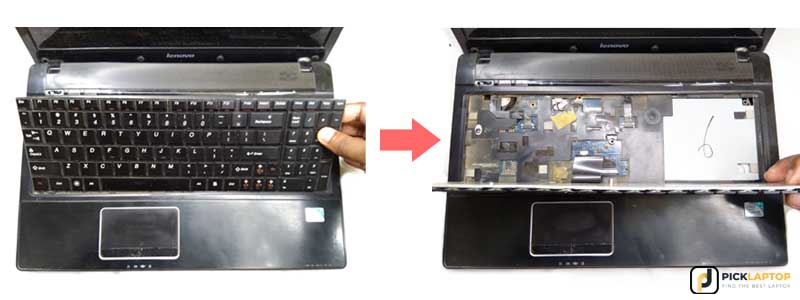
Since you have already removed all the screws, the keyboard, DVD writer, and wireless adapter must have loosened. Now, gently remove the keyboard while carefully removing its ribbon cable.
Removing the keyboard might be tricky for some laptops, so don’t rush; an unexpected jerk or excessive force can do irreparable damage.
If your system has a DVD writer, take it out; don’t forget to remove the wireless adapter as well.
Note: Remember the screw’s original location; it comes in handy during assembly.
Step 5: Remove the Upper Shell
After removing the keyboard, there might be some screws beneath it; remove them. Moreover, if you can see any ribbons or connectors, remove them as well.
While removing the upper shell, be careful because there may be a ribbon cable or a connector.
Note: Don’t apply excessive force; if you’re having a problem with removing the upper shell, recheck the bottom area for any hidden screw or part that might be holding it.
Step 6: Remove the Display Assembly
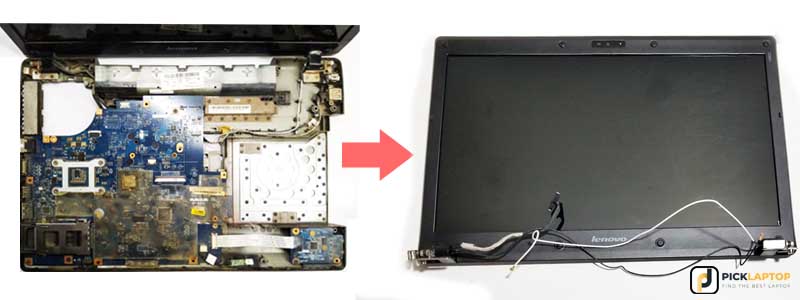
If you can already see the base of the display hinges before removing the upper shell, this step would be performed before step 5; it varies by laptop.
Well, unscrew the hinges, unplug the video and Wi-Fi antenna cables, and set the display assembly aside.
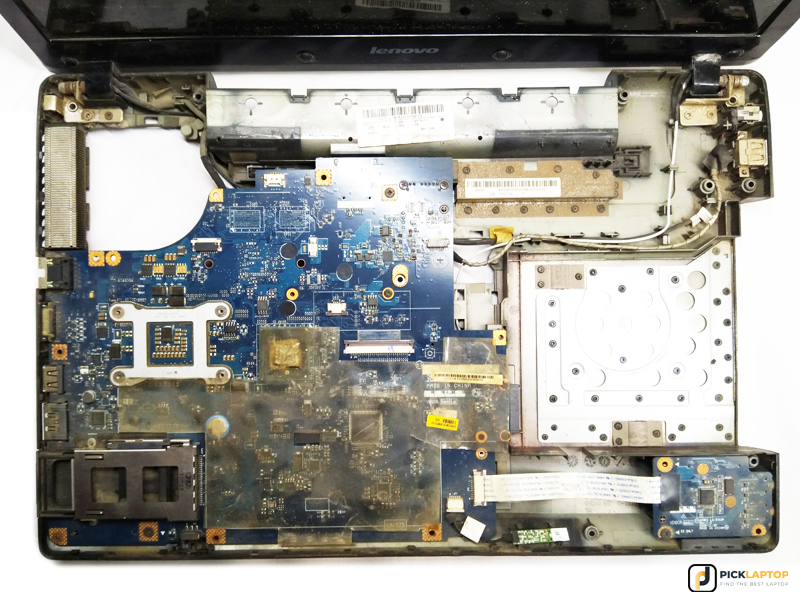
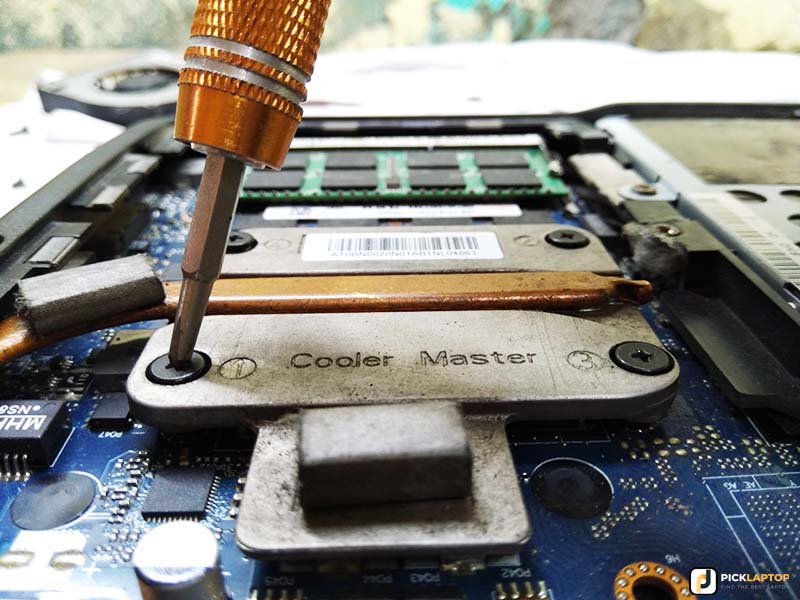
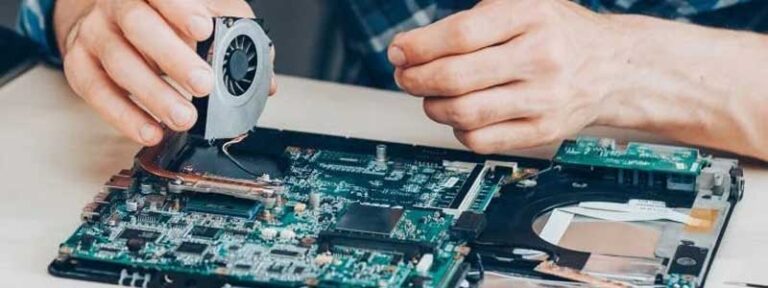
Step 7: Remove the Heatsink
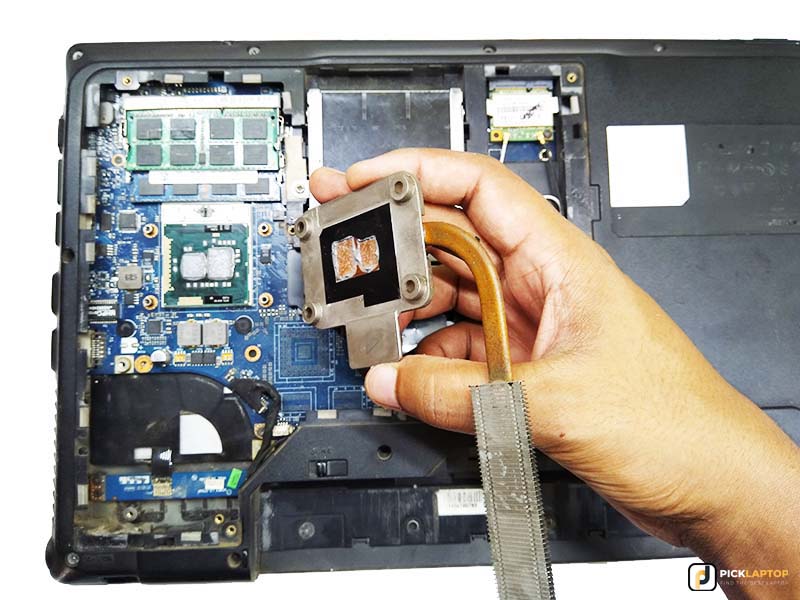
Now you can see the whole motherboard clearly; if your processor is mounted on the top side, you can remove the heatsink’s screws and access the processor and graphics card (if available).
If you can’t see the processor yet, you’ll need to remove the motherboard from the case.
Note: Please wear the antistatic wrist strap and ensure it is well grounded before touching any internal parts.
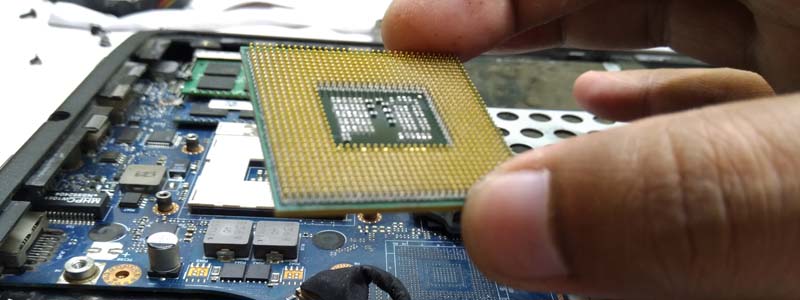
Step 8: Replace the CPU

After putting the heatsink aside, the processor slot should be in front of you. Now turn the CPU socket’s screw anticlockwise until it stops, and lift the processor gently straight up, remove it from the socket, and put it aside. Place the new CPU, and it should automatically slip into the slot if it’s properly seated. If it looks like it needs a push, there might be an alignment issue; recheck it.
After successfully placing the CPU, don’t forget to lock the CPU socket by turning the screw clockwise.
Note: Some old laptops might have a locking bar instead of a screw on the CPU socket.
Step 9: Apply Thermal Paste and Reassemble
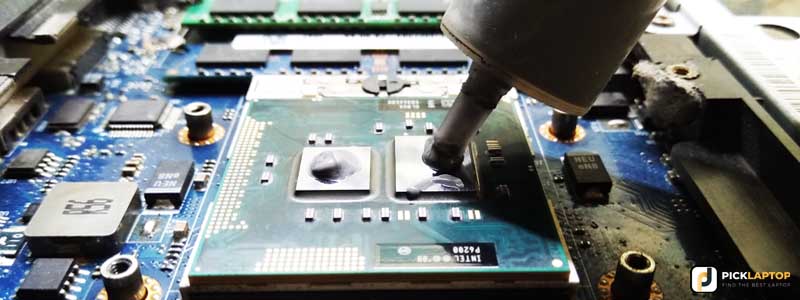
You have to prepare the heatsink anew—remove all old thermal paste (silver-gray gunk) with 99% isopropyl alcohol and a lint-free rag. If you have purchased an old CPU, make it clean as well.
After drying, apply a thin layer of thermal paste to the top of the CPU and spread it evenly with a plastic card. Put the heat sink and reassemble the laptop.
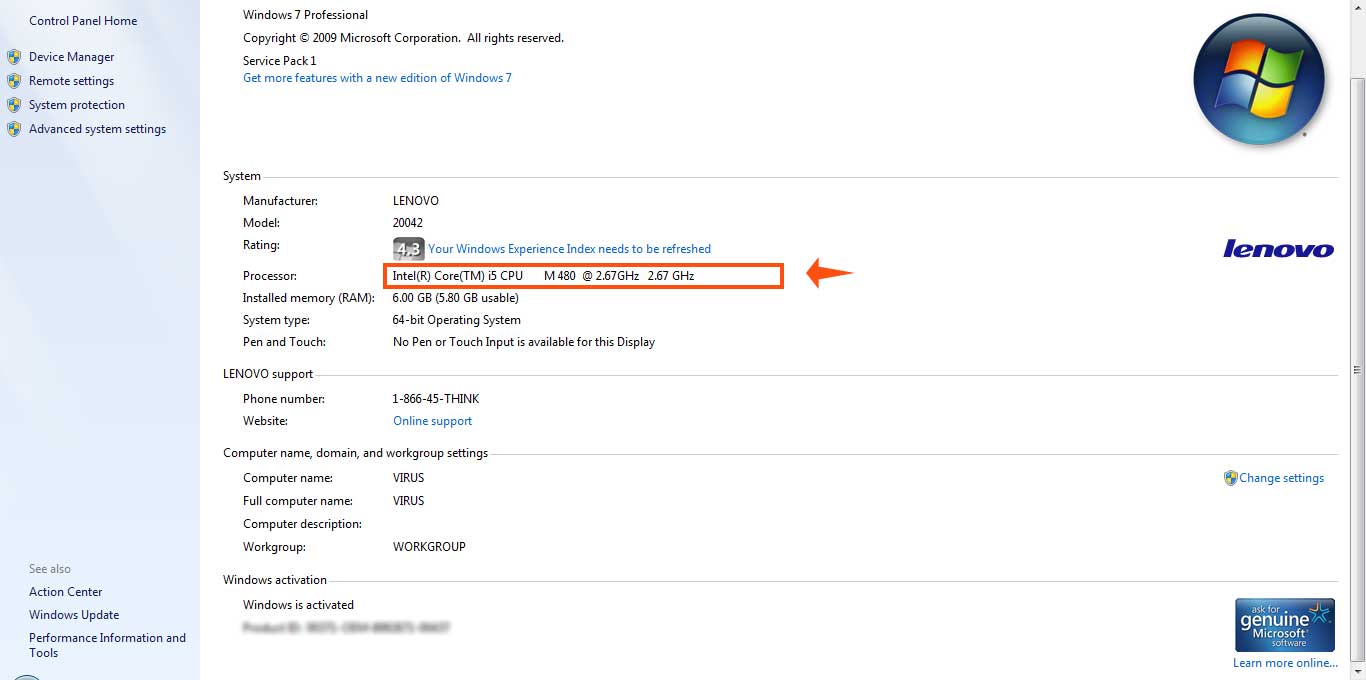
After booting, enter the BIOS and verify that the laptop can recognize the CPU correctly.
Finally, launch Windows and enjoy the higher performance of your new processor.
Note: Sometimes, Windows might fail to boot after placing a new processor, and you might need to reinstall it.
Thank you so much for reading. Have a great day. 🙂

This website truly has all of the information I needed about
this subject and didn’t know who to ask.